Welcome to this new feature on our website. The Training and Drills page is a combination of self-defense techniques, tactical drills and other interesting topics. These features will be addressed by videos, pictures and articles.
Our first topic is an appropriate one: Dealing with the proper way to present the handgun from concealment.
There are seven steps to handgun presentation from concealment:
Access, Grip/Chest, Pull, Rotate, Join, Extend, Fire
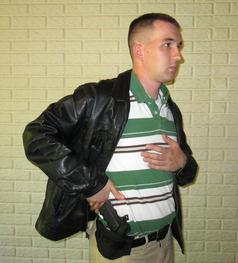
Access: The strong hand gains access to the gun under the clothing by clearing any clothing away from the holstered gun. Use an open palm (bladed hand). In some cases the weak hand may have to be used.
Grip: Grip the gun with the strong hand, making sure that the finger is outside of the trigger guard and straight alongside of the frame of the gun. At the same time bring the weak hand to the chest.
Pull: Make sure the trigger finger remains straight alongside the frame of the gun. Pull the handgun from the holster straight up, keeping the muzzle pointed in a safe direction.
Rotate: Handgun is turned toward the direction of the target. Be careful not to sweep yourself or others with the muzzle. Weak hand is kept close to the body, away from the muzzle. Strong hand is also kept close to the body. Deactivate the safety if the gun has one.
Join: In this step the weak hand and the strong hand come together to complete the two-handed grip. The handgun is raised somewhat during this movement, so that you effectively assume a two-handed, retention-ready position.
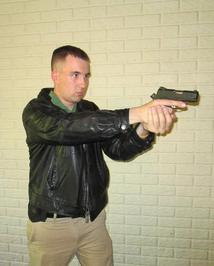
Extend: The gun is fully extended toward the attacker. If an aim technique is used, pickup sights as gun is extended forward. Remember to use just the front sight if time is a factor and the attacker is close.
Fire: The handgun can be fired as soon as the gun is aligned with the target if necessary.
After going through these steps, upon responding to a threat lower the gun below eye level and scan the surrounding area.
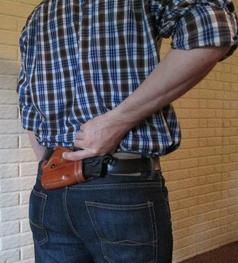
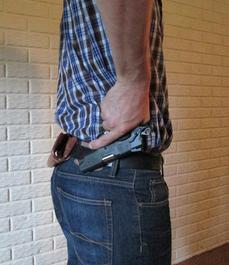
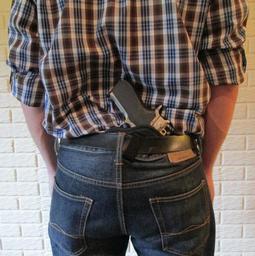
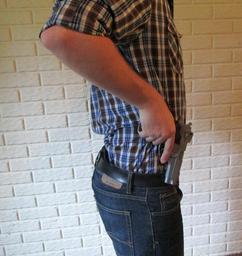
Presenting the Gun from the Small of the Back Holster
There are two styles of holsters - horizontal and vertical. The steps are the same as those required for drawing from the hip on the strong side. However, it should be noted that this is a considerably more dangerous draw. Caution must be exercised to avoid pointing the muzzle at the body or sweeping the muzzle outward, potentially pointing at innocent people. Using this method, as soon as the gun is drawn, the muzzle is to be pointed down and kept close to the body while taking care to rotate the gun only when it is in a safe position.
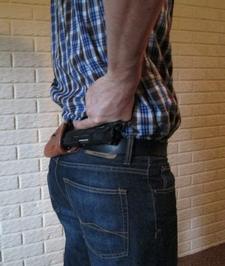
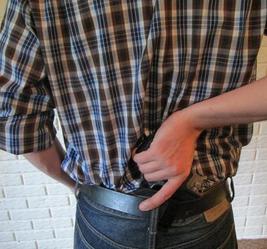
Access/Grip: Grip the gun with the strong hand, making sure that the finger is outside of the trigger guard and straight alongside of the frame of the gun. At the same time bring the weak hand to the chest.
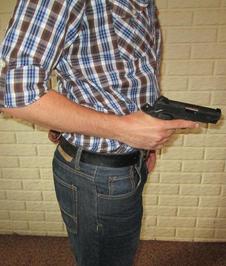
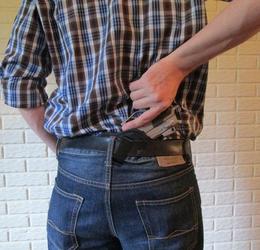
Pull: Make sure the trigger finger remains straight alongside the frame of the gun. Pull the handgun from the holster straight out, keeping the muzzle pointed in a safe direction and close to your body.
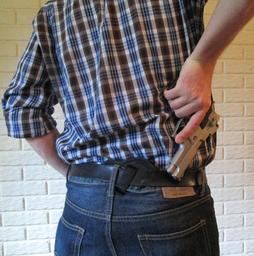
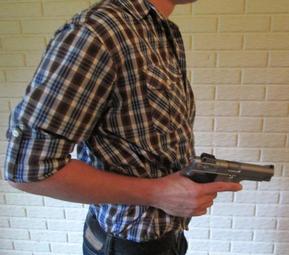
Rotate: Handgun is turned toward the direction of the target. Be careful not to sweep yourself or others with the muzzle. Weak hand is kept close to the body, away from the muzzle. Strong hand is also kept close to the body. Deactivate the safety if the gun has one.
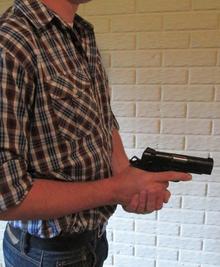
Join: In this step the weak hand and the strong hand come together to complete the two-handed grip. The handgun is raised somewhat during this movement, so that you effectively assume a two-handed, retention-ready position.
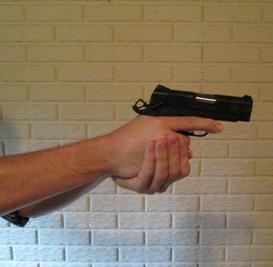
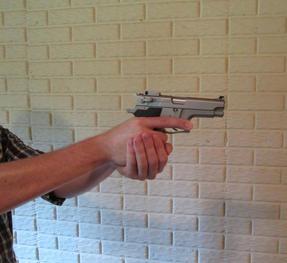
Extend: The gun is fully extended toward the attacker. If an aim technique is used, pickup sights as gun is extended forward. Remember to use just the front sight if time is a factor and the attacker is close.
Fire: The handgun can be fired as soon as the gun is aligned with the target if necessary.
After going through these steps, upon responding to a threat lower the gun below eye level and scan the surrounding area.
Presenting the Gun fron the Small of the Back with a Vertical Holster
Here it is all put together in a video:
This is basic drill that will be used in just about all of the drills that you will be introduced to.
Purpose - To stop an attacker meant to do life threatening harm.
The Drill - Draw, fire, retention, reholster keeping your eyes on the attacker at all times.
Before you watch the video lets break the drill down when encountering a deadly attack. Eyes on the attacker, draw, aim at the center mass, fire and continue firing until the threat is gone. Once the threat ends make sure you keep your eyes on the attacker while you reholster your gun. The decision of what shooting technique will be determined by the distance of the attack, the size of the target, lighting etc. Taking these considerations one will decide on aiming, point shooting, instinctive shooting or flash sight shooting. This will be discussed in future drills.
Watch this simple drill.
Drill two - Draw, fire three rounds, retention, assess, fire three rounds, scan with gun extended and re-holster with eyes on target.